
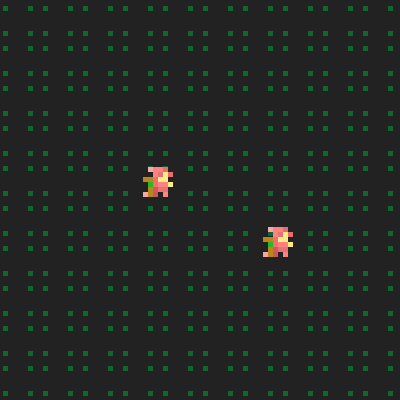
I set out with the goal of creating a simple multiplayer interaction in the browser. With absolutely no previous knowledge of how something like this was built, I did some research and discovered that my best bet would be node.js with web sockets and Javascript as my interface. In the end, I ended up coding most of it from scratch and my result was a 2D Javascript interface, in which players were represented by a sprite and could move, see other players move, and chat with them in a console.
With node.js, you create a simple server to which players can connect using websockets (from socket.io). A framework called express.js then allows you to pass HTML sites to the web, which acts as an interface between the node server and the player. The rest is done in Javascript, but the node server needs to be told how to handle player interaction, and how to pass the players information to one another. This is all done using event-based coding, meaning the entire game is built on the player and server both listening for simple commands and executing other commands based on this.
Node on Ubuntu takes a simple “index.js” file as its input, and will run the server from this index file directly from the terminal. After installing my dependencies (node, express, websockets) I loaded my dependencies in the file, and launched the server with this simple code:
//"/project/index.js"
//Launch the Server Notification
console.log("Launching Roguelike Server.");
console.log("Loading Dependencies...")

//Webserver (express.js)
var express = require('express');
var app = express();
var http = require('http').Server(app);
var path = __dirname + '/views/';

//Sockets (socket.io)
var io = require('socket.io')(http);
var fs = require('fs');
var xml = require('xml');
var xml2js = require('xml2js');
var DOMParser = require('xmldom').DOMParser;
console.log("Dependencies loaded.")

//Launch the Server
//Listening on Port 3000
http.listen(3000, function () {
  console.log('Listening on Port: 3000.');
});

//Push The HTML File To The Client
app.use(express.static('views'));
app.get('/', function(req,res){
	res.sendFile('index.html');
});

//...
This loads my dependencies, which I had previously installed to node. I won’t be covering how to correctly install these dependencies to node, as they have quite excellent documentation on their own.
This also tells the server to directly pass the file in “/project/views/index.html” to anyone connecting to the webserver (in my case “localhost:3000” or anywhere the node server is running) from the browser. This browser page then acts as my interface for player input and the node server.
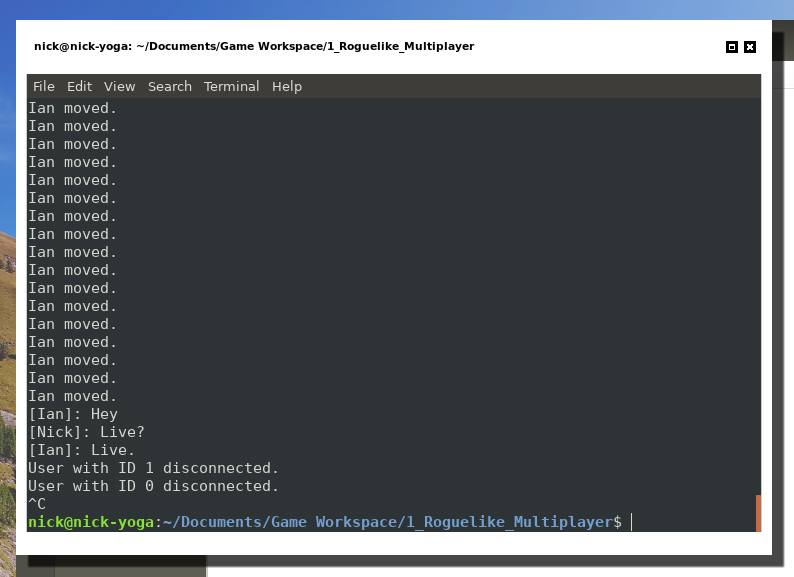
In my “index.js” file, the last thing I do is create an array for handling player on/off logging and set a series of event handlers. These event handlers are what the player interacts with. It handles connecting, disconnecting, movement and console messaging.
All the server is doing is looking at a specific websocket (variable “socket”), and determining if it is getting messages in from a player as an event from this websocket. These events look like “socket.on(‘funcName’,function([args])“, and the server responds by sending messages out to a player in the form “socket.emit(‘funcName’,[args]“. You can also emit a message to all players and not just a specific socket by using “socket.broadcast.emit()“.
//...

//Server-Side Game Logic
//Array (stack) to track Players
var players=[];

//Add Game Event Handlers
var setEventHandlers = function(){

    //When player connected
    io.on('connection', function(socket){

        //Player on- and off-logging logic here
        //...

        //Event: Player enters something into the console
	socket.on('playerConsoleMessage', function(ID, e){
	    //Check for Command
	    if(e.charAt(1)=="?"){
		console.log("Player issued command: "+e);

                //Command ?command
	        if(e==" ?command"){
                    //Send message to player
	            var s = "No command for you.";
	            socket.emit('serverConsoleMessage', s);
		}

	        //Command ?drain
                else if(e==" ?drain"){
                    //Send message to player
			var s = "Drained Health.";
			socket.emit('serverConsoleMessage', s);
		}
	    }

	    //Otherwise The Player Sent A Message
	    else{
	        console.log('['+players[ID].name+']:'+e);
		//Server Console Message Pushes Raw Text
		//Can Thereby Be Used To Send Anything!
		//New Container String with message
		var s = "["+players[ID].name+"]:"+e;
                //Send the message to the player
		socket.emit('serverConsoleMessage', s);
		//Send the message to all other players
                socket.broadcast.emit('serverConsoleMessage', s);
	    }
	});
    });
}

setEventHandlers();
//EOF index.js
It’s up to the code on the players side to then determine what to do with the messages it receives. When the server sends the line:
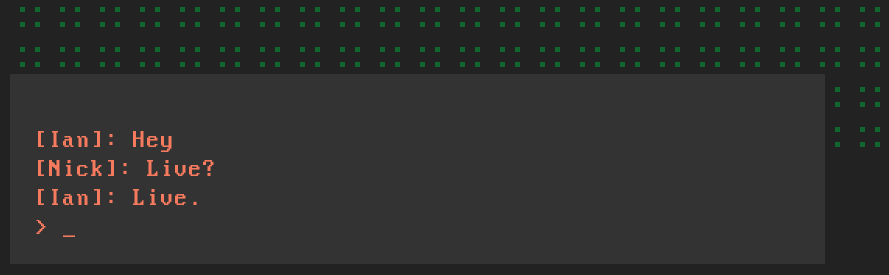
socket.emit('serverConsoleMessage', s);The player receives the message through a “socket.on” event, with a name ‘serverConsoleMessage’ and the argument s, which is a string containing the message. The player’s code later knows to append the string to the end of an array, and print that out in an on-screen console. Simple! The server does a similar thing, taking a message sent by a player, printing it to its own console, and then broadcasting it to all other players.
The remainder of the important code is now on the client’s side. The node web server is already passing a specific “/projects/view/index.html” to anyone connecting to my server on port 3000, so the player needs to be presented with a javascript interface with which to call its own socket.emit and socket.on functions and communicate with the server.
The page that the node server passes to the web-browser contains a field for entering your name, and upon clicking the confirm button passes you to another “/project/view/play.html” and sets the username variable in this file. This play view contains a simple HTML console with 5 paragraph elements for outputting the console text, and includes the Javascript files to run the game.
<!-- /project/views/play.html --!>
<!DOCTYPE html>
<html>
	<!-- All Pieces to Be Rendered on Top!-->
	<head>
		<meta charset=utf-8>
		<title>Roguelike</title>

		<div id="info">
		Roguelike<br>
		</div>

		<div id="char">
		</div>

		<div id="console">
			<p id="a"></p>
			<p id="b"></p>
			<p id="c"></p>
			<p id="d"></p>
			<p id="e">> _</p>
		</div>

		<link rel="stylesheet" href="style.css">
	</head>

	<body>
		<!-- Connection to Server !-->
		<script src = "/socket.io/socket.io.js"></script>
		<!-- Client and Rendering !-->
		<script src="js/pixi.min.js"></script>
		<script src="js/client.js"></script>
		<script src="js/render.js"></script>
	</body>
</html>
Finally, in these last three files, all the magic happens. I used pixi.js to do the rendering part. The file “/project/views/js/render.js” contained the logic for the general canvas object, drawing the grass, but also three very simple functions drawPlayer(), undrawPlayer() and updatePlayerPosition(). This way these functions could later be called by another file handling the client-server interaction. I ripped off the Isleward artwork for this demo, I hope that’s ok.
Then, in another file “/project/views/js/client.js“, the player had its own event handlers for getting commands from the server, upon which things could be written to the console (messages from other players), things could be broadcasted to the server (a change in player position), or a change in the rendering could be done (a player is un-drawn because they have disconnected).
// /project/views/js/client.js
//Connect to Socket
var socket = io();

//Get the Player Name from the Input Field in the HTML
var name = getName();
console.log("Welcome "+name+"!");

//Set up a random player position
var ID;
var players = [];
var position = new Object();
position.x = Math.floor(Math.random()*10);
position.y = Math.floor(Math.random()*10);
//Place Holder Stuff For Now

//Set up the event handlers
function setEventHandlers(){
    //Socket Connection
    socket.on("connect", onSocketConnected);
    //Socket Disconnection
    socket.on("disconnect", onSocketDisconnect);

    //Player Input Handler
    onkeydown = function(e){
    //If Player presses an arrow-key
    if(e.keyCode == 37 || e.keyCode == 38 || e.keyCode == 39 || e.keyCode == 40){
	//Emit Which Way You Moved and Your ID
	socket.emit('playerNudgePlayer', e.keyCode, ID);

        //Move the player according to the keycoke
			if(e.keyCode==37){
				position.x -= 0.5;
			}
			else if(e.keyCode==38){
				position.y -= 0.5;
			}
			else if(e.keyCode==39){
				position.x += 0.5;
			}
			else if(e.keyCode==40){
				position.y += 0.5;
			}
		}

                //...
                //Add messaging logic here
                //...
        }
}

function onSocketConnected(){
	console.log("Connected to Server.");
}

function onSocketDisconnect(){
	console.log("Disconnected from Server.");
}

//...
Players would also have some logic for receiving the various commands of the server, so that they would be informed when a new player joins and could add them to their local copy of the players registry and render them to the screen.
//Event: Receive 'serverNewPlayer' command from Server
socket.on('serverNewPlayer', function(eName, x, y){
	var player = new Object();
		player.name = eName;
		player.x = x;
		player.y = y;
	console.log("Player "+eName+" joined the game.");
    players.push(player);
    drawNewPlayer();
});
Finally, we are done. Players connect to a node server, which would assign them a unique player ID. Player and server both keep track of a list of players. When players give an input, they pass it to the server, which confirms their input and updates their position on the server, but also sends a command for a position update to all players. Players can also track new players and players leaving. Finally, each client is responsible for continually rendering the data to a simple canvas.
The player is capable of transmitting its keyboard inputs to the server, but also keeps track of its own position. Somewhere in there, I also had the logic for transmitting a message to the server for broadcasting to other players via console, but I left it out for simplicity in the client-side code sample.
When a message was sent to the console, the server could also easily check if it began with a character, in my case “?”, to see if it was a specific command, and could move through a list of commands and execute code based on these inputs. This is visible in the server-side code further up in the article.
With all this, it should be possible to build a simple multiplayer interaction. This format alone would already be quite suitable for a multiplayer text-based adventure, and could easily be adapted to add simple game mechanics, such as saving customized characters to a file and allowing them to interact through weapons or collision. The decoupled rendering system would also allow players to be placed in various settings and “locations” on a map using a tile set.
You can find the whole code here: https://github.com/weigert/simplemultiplay
This demo should be live here: weigert.vsos.ethz.ch:3100
Connect through two separate browser windows to see the player interaction.
Leave a Reply
You must be logged in to post a comment.